Hello friends. Here's part 2 of the sequence; 'The sowing'. This title sounds like some sort of boring movie, but it's actually a very relaxing activity, something that could be of aid to many of you during the current crisis. I've done the work described below on April the 1st.
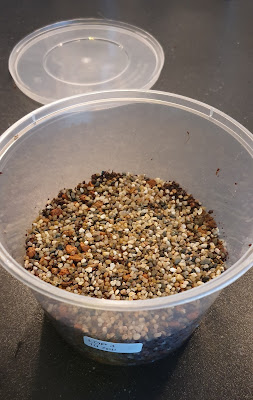
This year. I've used a slightly different method compared to the previous years. I didn't use perlite at all but instead used a mixture of one part baked clay, one part cocopeat and one part fine gravel.
 |
| Sowing soil |
After mixing it all up, I've added a little water and put the mixture in the oven for about 45 minutes (220 degrees celsius/428 degrees Fahrenheit, but I guess the temperature is not that strict).
After it cooled down, I added enough water to get the entire soil soaked, but not soo soaked that the water drips off when you squeeze it in your hand.
Something that has not changed is the usage of transparent plastic containers with lids. I just punched some holes in the bottom, and they were good to go.
The transparent containers that I use
Then I filled the containers up with the prepared soil, flatted it all a bit and added the seeds. Most of the seeds were added on top of the soil, except the Tephrocactus seeds, which are much larger than the rest. I've tried a little experiment with these larger seeds because the last time I've sown them, they did not germinate at all. The method that I've used is named scarification. I've just carved a small cut in each of the seeds and burrowed them a little in the soil. Before following my lead, I recommend you wait my following posts, to see if it worked out well or not.
 |
| My son filling up the containers with soil |
Thereafter, I've covered all the seeds (also the other species) with a thin layer of fine gravel, something I've seen many times online but never did so myself. This is supposed to help spread the sunlight and prevent the lower parts of the seedlings to stand in soil that is too moist.
 |
| A thin layer of fine gravel on top of the seeds |
Then I've covered up the containers.
 |
| Almost done |
 |
| 2020 sowing, ready to germinate! |
That's about it for this post. I hope you all enjoyed reading it and I'll get back to you later (somewhere next week). Take care and keep it green and spiny!


No comments:
Post a Comment