Friday, April 24, 2015

Peyote news, April 2015

Lophophora williamsii collection, ready for a new home!
Hello to all of you loyal blog readers! Yes, you're right. That's my entire Peyote collection laying naked on a wooden plate. I wanted to organize them a little better, because they were all standing in different pots, looking a bit chaotic... Let me re-introduce you to my Peyote tribe:

Lophophora williamsii, purchased during a trip to Amsterdam back in 2009.
My first Peyote. When I've bought this plant, I didn't even know that it was a cactus. Shame on me! But this squeezable, succulent plant is the reason I started to sow cacti. Not long after buying this plant and finding out about its fascinating history, I decided to buy myself a Peyote-growkit (I've written one of my first articles about it).

As you can see, the roots still contain a little bit of commercial mix (probably peat) that I just couldn't get off.

2011's seedlings

I'll let the following photos speak for themselves. One thing I would like to add is that you can really see the difference between the root-system of my seedlings and a L. williamsii grown in a peat based soil mix. I use a mineral soil mix that contains 70% fine grit and 30% cat litter. As mentioned in my previous article, you should only use cat litter if it doesn't turn in to pulp after standing a couple of days in water. I also recommend you to wash the litter a couple of times to get rid of the added odors.

Lophophora williamsii, 4 years old.
Lophophora williamsii, La Popa, Nuevo Leon, 4 years old.
Lophophora williamsii, Nuevo Yucatan, 4 years old.

2012's seedlings

Lophophora williamsii var. caespitosa is actually the same species as the normal L. williamsii, but is a hybrid, cultivated by selecting plants with many offsets. A normal L. williamsii can have the same appearance, but it's not guaranteed.

Lophophora williamsii var. Caespitosa, La Perdida, 3 years old.

Purchased in the end of 2014

Lophophora williamsii var. caespitosa, purchased last year.
As mentioned in the caption: the plant above is a L. williamsii var. caespitosa that I've bought last year. I just had to possess some older plants. More will be added to my collection soon (after the upcoming cacti show).

Re-potted

I was having doubts about what kind of pots I should use to re-pot them. I've decided to place them all in these two containers, because I think I'm using less space this way. I also think that it looks more organized.

Lophophora williamsii var. Caespitosa on the left and the normal Lophophora williamsii on the right.
Lophophora williamsii Nuevo Yucatan on the left and  Lophophora williamsii La Popa, Nuevo Leon on the right.


The End

A short update on what I've sown this year: 40/40 Astrophytum caput-medusae up and the Sulcorebutia germination of this year sucks! (the rest is going average)

That's it for now. Have a nice day and till next time!

Sunday, April 05, 2015

Sowing time!


Hello to all of you! What a nice day to sow! Not on April the first, as I normally do, but on April the fifth. I just had to wait for some true spring weather before I could start putting seeds into the soil. A nice and sunny Easter it is and after spending some time with my wife and kid (searching eggs and stuff), it's time to sow!

This is the day that I'm the only one that is allowed in the kitchen. My wife hates it! All that mess: seeds, soil and gravel all over... Well, everywhere! And it takes hours!

Preparations
It's always good to have everything ready before you start. It's just not cool if you have to search for stuff when you're busy. I like to work organized and structured.

The seeds
Let me just name everything I'm going to sow again. This time with two new additions to my plan (of course...):

Cacti:
  • Astrophytum caput-medusae (40 seeds)
  • Sulcorebutia arenacea (100 seeds)
  • Sulcorebutia azurduyensis (20 seeds)
  • Sulcorebutia canigueralii (15 seeds)
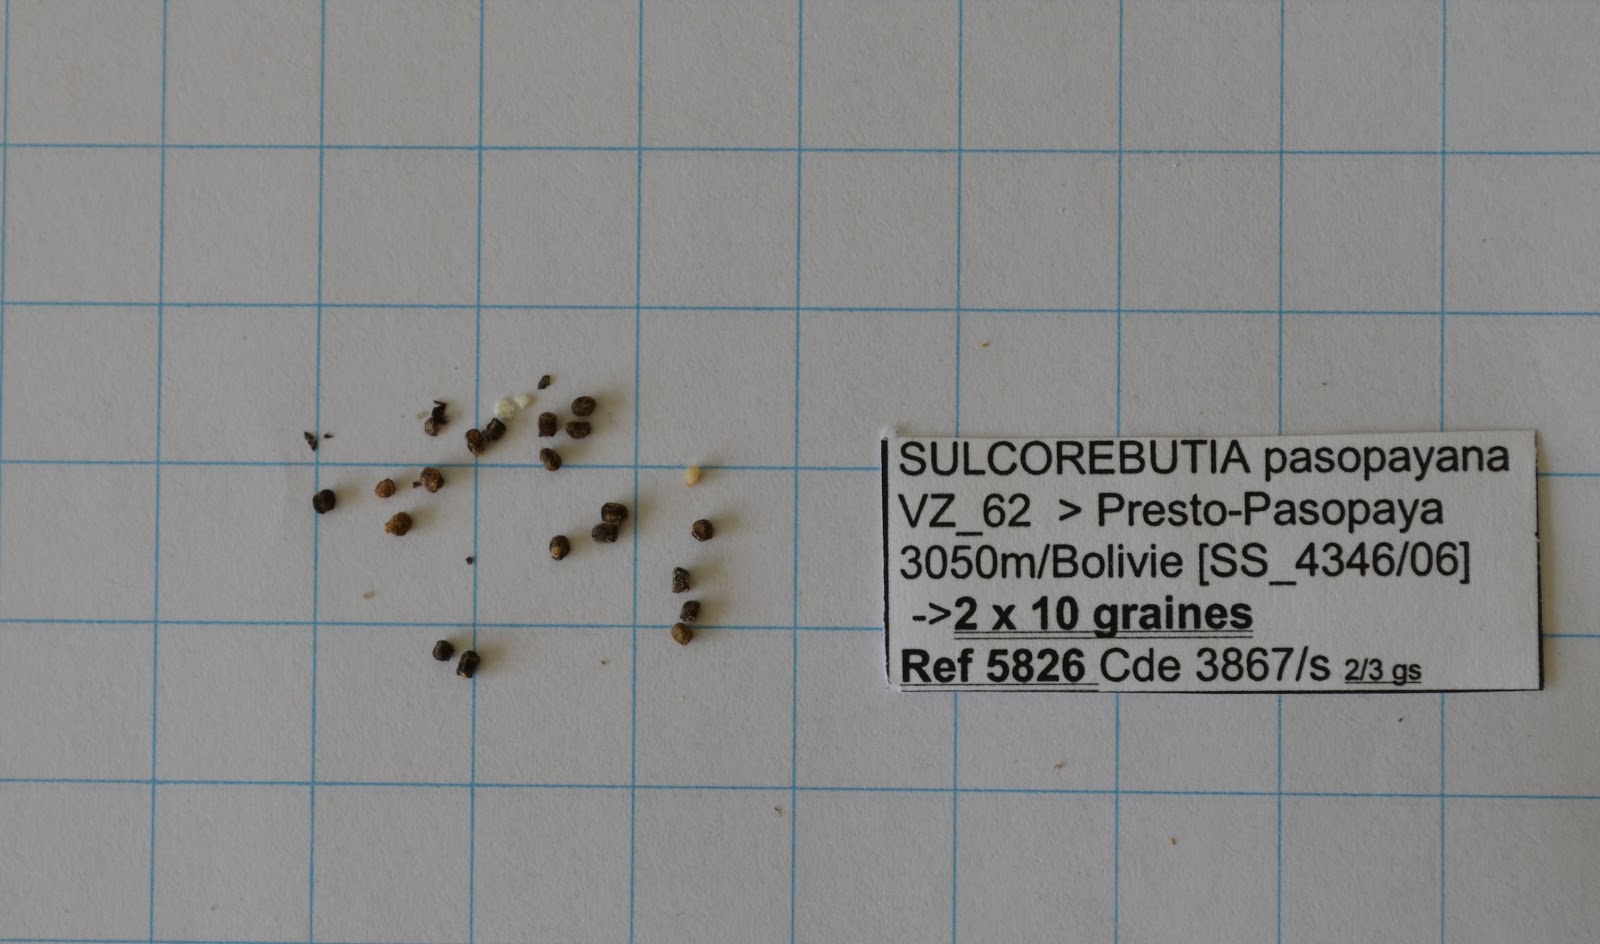
  • Sulcorebutia pasopayana (20 seeds)
  • Sulcorebutia rauschii (20 seeds)
  • Trichocereus pachanoi (100 seeds)
  • Echinocactus texensis
  • Ariocarpus agavoides
Other succulents:
  • Agave parryi (20 seeds)
  • Stapelia grandiflora

E. texensis and A. agavoides are added as you can see if you compare this article with the previous one. E. texensis is also known as the Horse-crippler because of its strong and "mean" spines which are known to puncture everyone that steps on it. I just love the name! This and of course a pretty appearance convinced me to buy the seeds. A. agavoides came along with the rest of my order from Mr. Gerardo. A very nice thing to do and highly appreciated!

Ingredients

Soil ingredients


  • 20% Fine gravel
  • 30% Cat litter
  • 50% Sowing soil
If you're planning to use these ingredients for your soil mixture: please take care to wash the gravel and especially the cat litter very well! Keep in mind that not all cat litters are good to use in your mixture. An easy way to test this is to put a couple of spoons of cat litter in a glass of water and then leave it alone for some days. If the litter hasn't turn into pulp, it's probably usable.


Also handy
Just some pots, plastic to cover them up, rubber bands and my temporary pocket knife.

The soil
The soil is already mixed here and the two small bowls contain sowing soil and fine gravel (I'll explain you later what I'll do with it)

Sterilization in the oven 
45 minutes in the oven to sterilize the soil. This is to assure that there won't be anything alive inside the pots besides the seeds!

Ready to sow!
As you can see in the photo up here, I'm ready to sow! I'm putting a thin layer of normal sowing soil on top of the mixture, then I add the seeds, then another thin layer of sowing soil and then a little bit of fine gravel. My theory is that the soaking and muddy sowing soil will increase the germination chance, that the mixture beneath it will guarantee a healthy and "dry" growth for the roots and that the fine gravel on top of it all will help the small seedlings to stand up right and strong and will prevent rot at the lower parts of the plants. I'm still experimenting and I hope to find a successful way for me to use in the future. Let's see what happens!

The seeds

I think it's amazing to see all the different forms and sizes of plants that belong to the same family. Very fascinating, don't you think?!

Sulcorebutia arenacea seeds

Sulcorebutia pasopayana seeds

Sulcorebutia canigueralii seeds

Sulcorebutia rauschii seeds

Sulcorebutia azurduyensis seeds

Ariocarpus agavoides seeds

Astrophytum caput-medusae seeds

Echinocactus texensis seeds

Agave parryi seeds

Stapelia grandiflora seeds

Trichocereus pachanoi seeds

Covered with fine gravel

Done!

Ready to germinate
If you look well, you can see a small bottom-heater under the aquarium to keep the temperature up. It has to be around 25 degrees Celsius and I'm living in the Netherlands, so I need some extra heat.

Done!
Now all that I can do is wait. I'll bring you a full report about the germination rate when the time is right. Now it's time to finish my pipe and spend some time with my family, which is actually the most important thing in life for me. Hobbies are great and I really enjoy them, but I would give up everything for my sweet wife and wonderful son! Time passes so quickly and Arthur is already running around and trying to get his hands on everything he can reach... Life's great! Till next time!